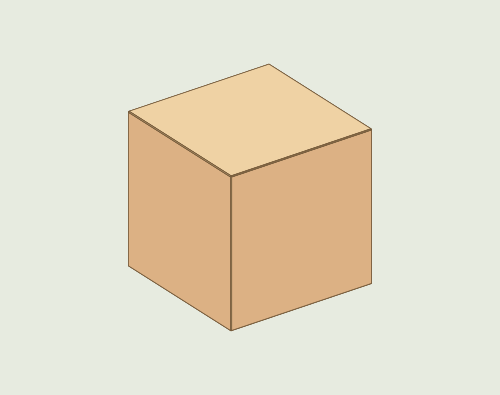
Prepare materials and tools
 Reused boxLook for clean, dry 0.5 mm solid paperboard.
 ScissorsOr use a craft knife and cutting mat.
 Pencil, ruler & scorerUse a blunt scorer for folds and calipers to check board thickness.
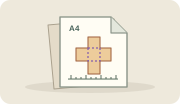 A4 templatesPrint at 100% and check the 100 mm ruler before tracing.
 Glue for the flapsWhite PVA glue or a low-temp hot glue gun. Test the bond on an offcut.
Check the cut edge. Look for a thin, solid edge with no wavy layer. The whole blank needs a flat area of 170 × 210 mm. Check the board →
Choose your board and open the A4 templates ↓Materials and A4 templates
Print at 100% / Actual size and check that the printed ruler measures 100 mm.
The final A4 page contains the stickers for all three ready-made looks.
Transfer the fold lines and face labels to the outside face. Test the crease and glue on a scrap of the printed board.
One cut piece
The six square faces and seven tapered flaps stay connected. Cut the outer line and lightly score the dashed lines. Use the A4 sheets to trace at actual size.
N
Part details
Technical drawings
Arrows show dimensions in millimeters. Coordinates in the tables start at the lower-left corner of the cut blank. Use the A4 templates for actual-size tracing.
One-piece box net · N
Solid brown · cutDashed purple · score and fold
- Cut around the solid outer outline.
- Score and fold along the dashed lines.
Exact coordinates and edge lengths
Measure from the lower-left corner of the blank. X runs right and Y runs up. The tables have their own row numbers. Join the outer edges in order.
| Mark | Feature | X, Y in mm | Dimensions in mm |
|---|---|---|---|
| 1 | Glue flap | 35, 110 · Center of base | Fold width 50 · Tip width 42 · Depth 10 |
| 2 | Glue flap | 135, 110 · Center of base | Fold width 50 · Tip width 42 · Depth 10 |
| 3 | Glue flap | 35, 160 · Center of base | Fold width 50 · Tip width 42 · Depth 10 |
| 4 | Glue flap | 135, 160 · Center of base | Fold width 50 · Tip width 42 · Depth 10 |
| 5 | Glue flap | 10, 135 · Center of base | Fold width 50 · Tip width 42 · Depth 10 |
| 6 | Glue flap | 160, 135 · Center of base | Fold width 50 · Tip width 42 · Depth 10 |
| 7 | Glue flap | 85, 10 · Center of base | Fold width 28 · Tip width 20 · Depth 10 |
| Line | Instruction | From X, Y | To X, Y | mm |
|---|---|---|---|---|
| 1 | fold | 60, 160 | 60, 110 | 50 |
| 2 | fold | 110, 110 | 110, 160 | 50 |
| 3 | fold | 60, 110 | 110, 110 | 50 |
| 4 | fold | 110, 160 | 60, 160 | 50 |
| 5 | fold | 60, 60 | 110, 60 | 50 |
| 6 | fold | 10, 110 | 60, 110 | 50 |
| 7 | fold | 110, 110 | 160, 110 | 50 |
| 8 | fold | 60, 160 | 10, 160 | 50 |
| 9 | fold | 160, 160 | 110, 160 | 50 |
| 10 | fold | 10, 160 | 10, 110 | 50 |
| 11 | fold | 160, 110 | 160, 160 | 50 |
| 12 | fold | 71, 10 | 99, 10 | 28 |
| Edge | From X, Y | To X, Y | mm |
|---|---|---|---|
| 1 | 110, 60 | 110, 110 | 50 |
| 2 | 110, 110 | 114, 100 | 10.77 |
| 3 | 114, 100 | 156, 100 | 42 |
| 4 | 156, 100 | 160, 110 | 10.77 |
| 5 | 160, 110 | 170, 114 | 10.77 |
| 6 | 170, 114 | 170, 156 | 42 |
| 7 | 170, 156 | 160, 160 | 10.77 |
| 8 | 160, 160 | 156, 170 | 10.77 |
| 9 | 156, 170 | 114, 170 | 42 |
| 10 | 114, 170 | 110, 160 | 10.77 |
| 11 | 110, 160 | 110, 210 | 50 |
| 12 | 110, 210 | 60, 210 | 50 |
| 13 | 60, 210 | 60, 160 | 50 |
| 14 | 60, 160 | 56, 170 | 10.77 |
| 15 | 56, 170 | 14, 170 | 42 |
| 16 | 14, 170 | 10, 160 | 10.77 |
| 17 | 10, 160 | 0, 156 | 10.77 |
| 18 | 0, 156 | 0, 114 | 42 |
| 19 | 0, 114 | 10, 110 | 10.77 |
| 20 | 10, 110 | 14, 100 | 10.77 |
| 21 | 14, 100 | 56, 100 | 42 |
| 22 | 56, 100 | 60, 110 | 10.77 |
| 23 | 60, 110 | 60, 60 | 50 |
| 24 | 60, 60 | 60, 10 | 50 |
| 25 | 60, 10 | 71, 10 | 11 |
| 26 | 71, 10 | 75, 0 | 10.77 |
| 27 | 75, 0 | 95, 0 | 20 |
| 28 | 95, 0 | 99, 10 | 10.77 |
| 29 | 99, 10 | 110, 10 | 11 |
| 30 | 110, 10 | 110, 60 | 50 |
Folded glue flap
Assembly sequence
Read through the steps here, or rotate the exploded model and follow the build in Studio.
1. Cut and pre-fold the blank
Cut the solid outer line. Lightly score all dashed lines, pre-fold the faces and flaps, then lay the blank flat again.
View in Studio →2. Apply glue to four wall flaps
Lay the blank with its marked outside face up. Coat the two tapered flaps along the front and back edges of each side wall. The blue areas show where the glue goes.
View in Studio →3. Fold and join the walls
Turn the blank over so the top rests on the work surface. Raise both side walls and fold their glued flaps inward. Raise the front and back walls over the flaps, then press the seams from inside the open box.
View in Studio →4. Coat the two bottom support flaps
Once the wall seams hold, fold the remaining flap on each side wall inward. Spread glue on the exposed faces where the bottom will sit.
View in Studio →5. Coat the bottom closing flap
Keep the bottom panel open. Fold the last tapered flap inward and coat the face that will touch the inside of the back wall.
View in Studio →6. Close and seal the bottom
Swing the bottom panel over the two side flaps. Tuck its closing flap just inside the back wall. Press along the three seams and hold them in place while the glue sets.
View in Studio →Printable prototype. Test the creases and glue on a scrap of your board before cutting the full blank.