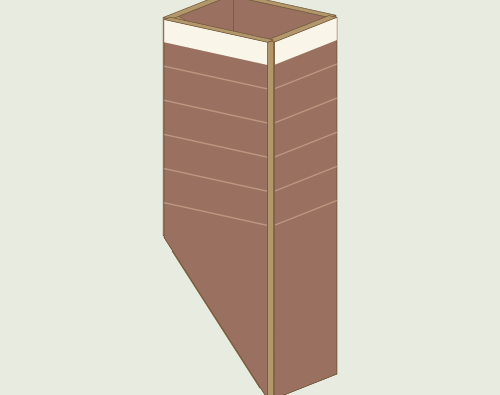
Prepare materials and tools
 Reused boxLook for clean, dry 2 mm single-wall corrugated board.
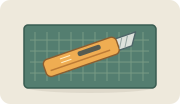 Craft knife & matUse a mat under the board while cutting.
 Pencil, ruler & scorerUse a blunt scorer for folds and calipers to check board thickness.
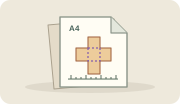 A4 templatesPrint at 100% and check the 100 mm ruler before tracing.
 White PVA glueUse a thin coat and test the bond on an offcut.
Check the cut edge. Look for one wavy layer between two flat liners. The whole blank needs a flat area of 104.5 × 76.7 mm. Check the board →
Choose your board and open the A4 templates ↓Materials and A4 templates
Print at 100% / Actual size and check that the printed ruler measures 100 mm.
Try the corner fold on a scrap of the same board. Use a blunt scorer and keep all six creases on the connected blank.
One cut piece
Cut CH once. Score the three corners, the seam flap, and the two angled feet. Use the A4 sheets to trace at actual size.
CH
Part details
Technical drawings
Arrows show dimensions in millimeters. Coordinates in the tables start at the lower-left corner of the cut blank. Use the A4 templates for actual-size tracing.
Chimney wrap · CH
Solid brown · cutDashed purple · score and fold
- Cut around the solid outer outline.
- Score the dashed line. Fold foot inward.
- Score the dashed line. Fold corner 90°.
- Score the dashed line. Fold seam inside.
Exact coordinates and edge lengths
Measure from the lower-left corner of the blank. X runs right and Y runs up. The tables have their own row numbers. Join the outer edges in order.
| Line | Instruction | From X, Y | To X, Y | mm |
|---|---|---|---|---|
| 1 | fold foot inward | 4.48, 28.46 | 26.48, 3.71 | 33.11 |
| 2 | fold corner 90° | 28.48, 1.46 | 28.48, 76.71 | 75.25 |
| 3 | fold corner 90° | 49.48, 1.46 | 49.48, 76.71 | 75.25 |
| 4 | fold foot inward | 51.48, 3.71 | 73.48, 28.46 | 33.11 |
| 5 | fold corner 90° | 75.48, 30.71 | 75.48, 76.71 | 46 |
| 6 | fold seam inside | 96.48, 30.71 | 96.48, 76.71 | 46 |
| Edge | From X, Y | To X, Y | mm |
|---|---|---|---|
| 1 | 2.48, 30.71 | 4.48, 28.46 | 3.01 |
| 2 | 4.48, 28.46 | 0, 22.21 | 7.69 |
| 3 | 0, 22.21 | 19.74, 0 | 29.71 |
| 4 | 19.74, 0 | 26.48, 3.71 | 7.69 |
| 5 | 26.48, 3.71 | 28.48, 1.46 | 3.01 |
| 6 | 28.48, 1.46 | 49.48, 1.46 | 21 |
| 7 | 49.48, 1.46 | 51.48, 3.71 | 3.01 |
| 8 | 51.48, 3.71 | 58.21, 0 | 7.69 |
| 9 | 58.21, 0 | 77.95, 22.21 | 29.71 |
| 10 | 77.95, 22.21 | 73.48, 28.46 | 7.69 |
| 11 | 73.48, 28.46 | 75.48, 30.71 | 3.01 |
| 12 | 75.48, 30.71 | 96.48, 30.71 | 21 |
| 13 | 96.48, 30.71 | 104.48, 33.21 | 8.38 |
| 14 | 104.48, 33.21 | 104.48, 74.21 | 41 |
| 15 | 104.48, 74.21 | 96.48, 76.71 | 8.38 |
| 16 | 96.48, 76.71 | 2.48, 76.71 | 94 |
| 17 | 2.48, 76.71 | 2.48, 30.71 | 46 |
Assemble the chimney
Read through the steps here, or rotate the exploded model and follow the build in Studio ↗.
1. Cut and score the wrap
Trace CH onto 2 mm single-wall board. Cut the solid outline. Lightly score the three corners, the seam flap, and both sloped feet.
View in Studio ↗2. Dry-fold the four walls
Fold the three corner scores to 90°. Tuck the narrow seam flap inside the first wall. Check that the top rim is level and the sides form a rectangle.
View in Studio ↗3. Apply glue to the seam flap
Open the seam enough to brush a thin coat of PVA on the blue face. Keep the roof feet free.
View in Studio ↗4. Close and square the chimney
Press the seam flap against the inside of the first wall. Square the corners and hold the overlap until the glue grips.
View in Studio ↗5. Fold both roof feet inward
Fold the two feet in along their angled scores. Their undersides should sit in the same plane. Let the seam set before fitting the chimney to the roof.
View in Studio ↗Connection spec for project designers
Reserve a clear 39.14 × 21 mm patch on the roof surface. This chimney seats on a 9:8 rise-to-run pitch (48.37°).
Keep the roof panel intact. Apply PVA to the underside of both feet when the host guide calls for installation.
Dry-fit the seam and check both feet against a matching roof slope before gluing.